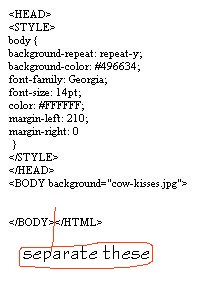
These instructions will make the stationery, that you have made with Outlook Express 5's Wizard, First thing you will have to do is download a zip file with the scroll code. ------------------------------------------------------------ Unzip this and put it wherever you want. I would suggest putting it in your stationery folder for easy access. Once you have done that you can go make a new stationery with the wizard. Okay, when you make stationery with the wizard you will find that it puts the picture that you used and a blue E (represents the code) in your stationery folder. Once you have made your new stationery, go to the text file with the scroll instructions and open it up. Click on EDIT and Choose SELECT ALL. This will highlight everything in this file. Then, while it is all highlighted right click anywhere on the highlighted section and choose COPY. You have just copied the instructions we will need to insert into the code of the stationery you just made. Find the code to the stationery that you just made. Look for the blue E with the name you choose in the wizard. Right click on it and choose EDIT. It will open up and look just like the picture below. Look down at the bottom. See the area between the red lines? You need to separate those. So just click you cursor in-between them and hit return a couple of times.
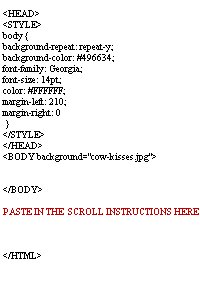
It should look like this - Now we need to put the instructions that you just copied into this space. Left click in that space you just created and choose PASTE. The instructions you copied should appear. Go to FILE and choose SAVE. You now have scrolling stationery :-)  |

